
The Hivemind Secret Mount Guide
The Hivemind is a Secret Mount that resembles a jellyfish brain with tentacles. The Hivemind is one of the major secrets added in Battle for Azeroth, along with Baa'l, the Waist of Time and Jenafur.
The Hivemind mount acts as a vehicle, allowing the last players you attuned with to join your Hivemind. The mount's movement speed is increased by 10% for every player that joins the vehicle (Joined Hivemind). If you want to link with different people, you'll have to complete the final parts of the puzzle again.

Colored Crystal Monocles
To start the secret you will first have to purchase Talisman of True Treasure Tracking from Griftah in Shattrath.
/way #111 65.8 68.2 Griftah
Equip the Talisman of True Treasure Tracking and the four items behind Griftah will start glowing.
- Red Glowing Fish - leads to a trading game puzzle in Vashj'ir
- Blue Glowing Letter - leads to an anagram puzzle
- Green Glowing Feather - leads to a puzzle in Skyreach
- Yellow Glowing Pyramid - leads to a puzzle in Halls of Origination
You will need the talisman to complete the following puzzles. The reward of each puzzle is a corresponding colored monocle.
Note: You don't have to get all 4 monocles in order to solve the Wild Withered puzzle. Having one monocle is enough if every player in your group has a different colored monocle.


Red Crystal Monocle
To get the Red Crystal Monocle you will have to complete the trading game puzzle in Vashj'ir.
While wearing the Talisman of True Treasure Tracking you are now able to interact with multiple vendors. You will have to purchase items and trade them one for another in the order below. You will need a total of 2380 gold in order to buy the initial Seashells from Sir Finley Mrrgglton.
Important: The items related to this puzzle have a limited time of 5, 30 and 60 minutes. While the timer is lenient (no pressure!), note that you must follow the purchase order as it's listed below.
Note: If you can't see Volatile Violetscale or other npcs then completely exit the game and log back in.
Tip: To swim faster you can use the Vashj'ir Seahorse. If you don't have this mount then you can swim to the surface of the water, mount up and fly to the next npc.
First Item: 50 Glittergill Glitter
/way #205 44 20 Step 1 - Sir Finley Mrrgglton - Buy 500 Seashell

/way #204 38.8 79.5 Step 2 - Volatile Violetscale - Buy 100 Cavity-Free Great Shark Tooth

/way #205 52.7 22.1 Step 3 - Manta Stargazer - Buy 50 Razoreel Larva

/way #205 68.3 48 Step 4 - Lil' Whalley - Buy 250 Well-Fed Doctor Fish

/way #204 66.1 42.7 Step 5 - Gloomy Bluefin - Buy 10 Freshly Molted Crab Skin

/way #201 60 59 Step 6 Ol' Fishbreath - Buy 50 Glittergill Glitter
Second Item: 40 Symbiotic Plankton
/way #205 44 20 Step 1 - Sir Finley Mrrgglton - Buy 80 Seashell

/way #204 66.1 42.7 Step 2 - Gloomy Bluefin - Buy 2 Giant Giant Toenail Clipping

/way #204 45.4 17.6 Step 3 - Little Carp - Buy 4 Makrura Eye

/way #204 38.8 79.5 Step 4 - Volatile Violetscale - Buy 1 Accidentally-Severed Seahorse Fin

/way #205 53.4 89 Step 5 - Crimson Angerfish - Buy 2 Shiny Sea Serpent Scale

/way #205 52.7 22.1 Step 6 - Manta Stargazer - Buy 40 Symbiotic Plankton
After you get 50 Glittergill Glitter and 40 Symbiotic Plankton go back to Sir Finley Mrrgglton and buy 5 Scintillating Murloc Skin Lotion.
/way #205 44 20 Sir Finley Mrrgglton
Third Item: 5 Potent Gastropod Gloop
/way #205 44 20 Step 1 - Sir Finley Mrrgglton - Buy 300 Seashell

/way #201 60 59 Step 2 - Ol' Fishbreath - Buy 30 Vantus Black Squid Ink

/way #204 15.6 83 Step 3 - The Blackfish - Buy 30 Super Slick Eel Slime

/way #204 38.8 79.5 Step 4 - Volatile Violetscale - Buy 3 Rock-Encrusted Whelk Shell

/way #204 45.4 17.6 Step 5 - Little Carp - Buy 5 Potent Gastropod Gloop
Fourth Item: 5 Captured Cavitation Bubble
/way #205 44 20 Step 1 - Sir Finley Mrrgglton - Buy 1500 Seashells

/way #205 68.3 48 Step 2 - Lil' Whalley - Buy 300 Very Pretty Coral

/way #201 60 59 Step 3 - Ol' Fishbreath - Buy 100 Iridescent Shimmerray Skin

/way #205 53.4 89 Step 4 - Crimson Angerfish - Buy 20 Luxurous Luxscale Scale

/way #204 15.6 83 Step 5 - The Blackfish - Buy 5 Captured Cavitation Bubble
With 5 Scintillating Murloc Skin Lotion, 5 Potent Gastropod Gloop and 5 Captured Cavitation Bubble go back to Sir Finley Mrrgglton and buy the Red Crystal Monocle.
/way #205 44 20 Sir Finley Mrrgglton
Blue Crystal Monocle
To get the Blue Crystal Monocle you will have to complete the anagram puzzle.
While wearing the Talisman of True Treasure Tracking you are now able to interact with letters scattered across Azeroth. Make sure to interact with the letters in following order.
Use this script to track your progress:
/run local a,b=C_QuestLog.IsQuestFlaggedCompleted,{40397,40314,40404,40252,40293,40288,50187,50181} for i=1,#b do print((i==8 and "Blue Monocle: " or "Letter #"..i..": ")..tostring(a(b[i]))) end
The First Letter is found at coordinates 65 69 in Shattrath, behind Griftah.
/way #111 65.8 68.2 First Letter

The Second Letter is found at coordinates 57.4 27.9 in Highmountain, inside the tent.
/way #650 57.4 27.9 Second Letter

The Third Letter is found inside the Karazhan Raid, on a chair in Medivh's Chambers.

The Fourth Letter is found inside the Razorfen Downs Dungeon, on a hey box behind the last boss.

The Fifth letter is found at coordinates 44.4 46.6 in Mount Hyjal, on a table inside the room at the top of the tree.
/way #198 44.4 46.6 Fifth Letter

The Sixth Letter is found at coordinates 70.7 73.3 in Icecrown.
/way #118 70.7 73.3 Sixth Letter

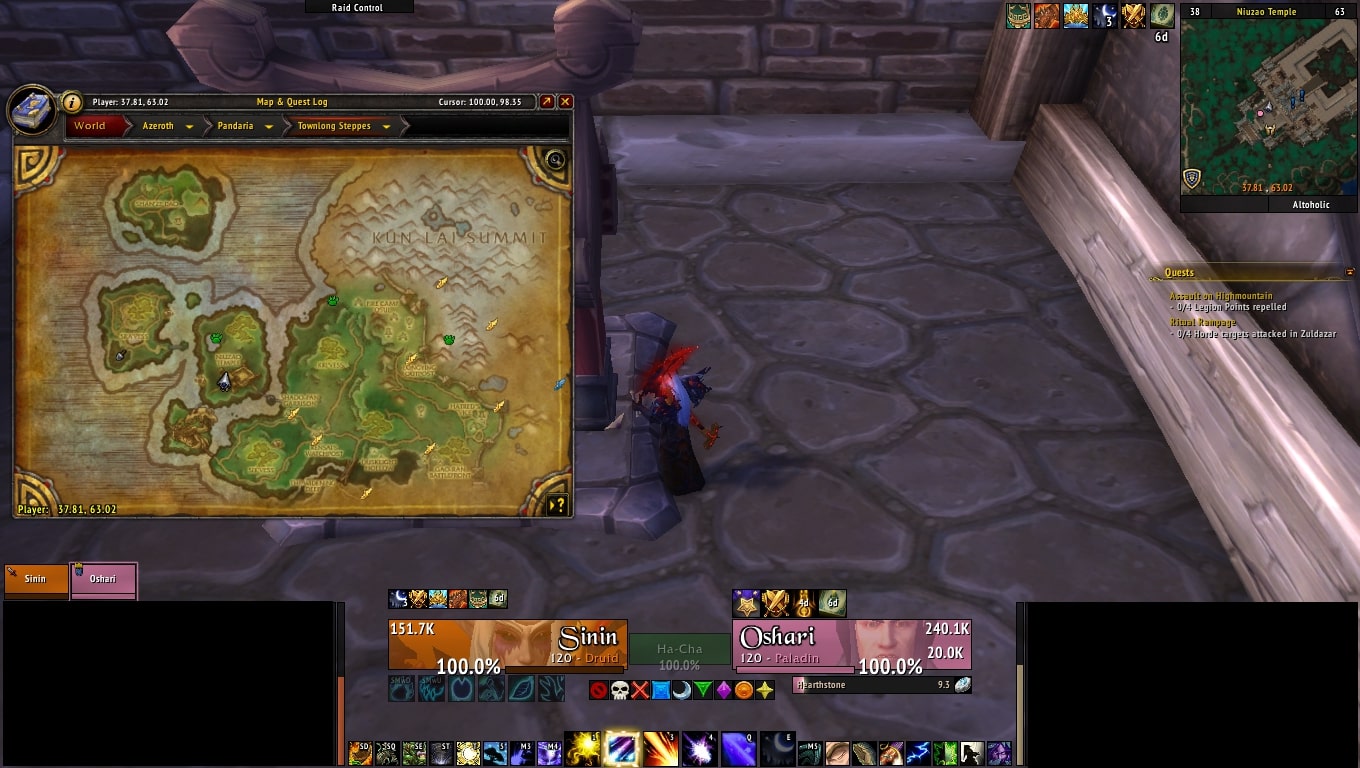
The Seventh Letter is found at coordinates 37.6 63 in Townlong Steppes, on the ground near the bell.
/way #388 37.7 63 Seventh Letter
The Gift of Ms. Graham which contains the Blue Crystal Monocle is found at coordinates 27.5 27.1 in Borean Tundra, at the top of The Nexus.
/way #114 27.5 27.1 Gift of Ms. Graham

If you want to see how this puzzle was solved then click on spoiler.
Green Crystal Monocle
To get the Green Crystal Monocle you will have to complete the Skyreach puzzle.
Equip the Talisman of True Treasure Tracking and go to Skyreach in Spires of Arak (Draenor). At the end of the dungeon, after you defeat High Sage Viryx, you will be able to interact with the "Basic" Instructions scroll.
_______ | 0000132
0000017 | #######
0001032 | #######
0000002 | 0012020
0000610 | #######
0000061 | #######
9113824 | ??????????


Interact with the Small Glowing Orb from the console and multiple colored lights will appear in the distance. You will also get the Inky Blackness buff for 2 hours.
To complete the puzzle press the buttons on the control pad in the following sequence. If it doesn't work, then wait 45 seconds and try again.
Right - Up - Down - Up - Right - Right - Up - Left - Down - Up - Left - Down
After you complete the puzzle, a chest containing the Green Crystal Monocle will spawn at the top of the console.
If you want to see how this puzzle was solved by the community then click on spoiler. If you want to see how this puzzle was intended to be solved by the developers then you can check Blizzard's post about The Hivemind.
Yellow Crystal Monocle
To get the Yellow Crystal Monocle you will have to complete the Halls of Origination puzzle.
Enter Halls of Origination and follow the path through the dungeon until you get to the elevator room. Head north from the elevator room and take the staircase on the right to reach the Stellar Refraction Device.


Click each constellation to change the colors of the other constellations near them. Once they have all been changed to the same color, they will despawn and a chest will spawn in their place which contains the Yellow Crystal Monocle.
- The Angular Stellar Refractor changes the colors of constellations positioned in a + formation.
- The Jagged Stellar Refractor changes the colors of constellations positioned in an X formation.
- The Round Stellar Refractor changes the colors of constellations adjacent to it.

You can use the Hivemind HoO Puzzle Helper Addon to solve this puzzle. You will have to fill your pattern with the stellar refractors and constellations, and then click on the "GO" button to see the solution.
After the puzzle is solved you can also invite players into your group to get the monocle. Be careful not to click on the Stellar Refraction Device as that will reset the puzzle.
Solving the Monocles
Each of the colored monocles has flavor text inscribed on them.
- Red: P O T Y A B U V F X
- Blue: Q P C X K B Z H A G
- Green: N R V Q Z J S M G Y
- Yellow: S K M C U F L N J O
Writing the alphabet twice then removing the letters above leaves us with "E E I I D D H L R T W W" which rearranged spell out "WILD WITHERED".
These 4 wild withered are Rikei, Blom'an, Giluzui and Yorilan. Their initials also match their eye color.
Wild Withered
The next part of the secret quest line must be completed as a group. You will need one person with each color monocle equipped. Initially the Wild Withered are friendly, however after you equip the colored monocle matching their eye color (or their initials) they will become hostile.
Four players will have to go to the withered that matches the color of their monocle.
/way #680 71.9 62.6 Red

/way #680 46.9 28.6 Blue

/way #680 20.3 46.4 Green

/way #680 43.6 81.8 Yellow
The fifth person will go to the upper level of a house in Suramar, and stay near a room that's blocked off by four beams of the same colors.
/way #680 41 69.5 Suramar Beams

Coordinate with your group to bring the withered npcs down to 1 health point at the same time. They will begin casting Draw Energy, which disables the beams for 6 seconds. When all four beams have been simultaneously disabled, the fifth person can enter the room.
Lost Cat Toy
Inside the room, the fifth person will be able to interact with the Lost Cat Toy behind the pillows.
Upon interacting with the Lost Cat Toy, the player will get zapped, take some damage and get teleported outside. Make sure to write down the amount of damage taken, as you will need that number for the next step.

Mana Kittens
For the next step, make your way to Lady Chaton in Court of Stars.

To solve this puzzle, you will have to pet the mana kittens and get Purring stacks on each cat corresponding to each digit of the number.
The order of the cats is Mrs. Fluffymuffins > Shadow > Mew > Ash > Bella (the order in which Lady Chaton got the cats).
For example, if your number is 12068 then you will have to get:
- 1 stack of Purring on Mrs. Fluffymuffins
- 2 stacks of Purring on Shadow
- 0 stacks of Purring on Mew
- 6 stacks of Purring on Ash
- 8 stacks of Purring on Bella
The code is always 5 digits. However, if you get a 3-digit or a 4-digit number then just add zeroes to the front. For example, if the player takes 123 damage then your 5-digit code will be 00123.

After all the cats have the right number of Purring stacks, an Ominous Orb will appear. Interact with it and you will get teleported to the next puzzle!

Phaseshifting Platforms
 Originally Posted by Blizzard (Source)
The next puzzle is a maze of sorts, taking place on floating platforms over a chasm.
It starts with one platform active. Each platform can be ridden by one player and activates 0–3 other platforms. Players can hop from platform to platform. A platform won't deactivate while there's someone on it, but as soon as you hop off it, if nothing is activating it, it'll disappear. Therefore, you must work as a group to progress throughout this maze, taking turns moving from platform to platform.
Once all five members of your group reach the door on the other side, it will open, letting you proceed.

Midnight Update: The puzzle solution has been revised, you can follow either of the two variants below. Also please feel free to share feedback on the instructions below!

Once all five players have made it through the phaseshifting platforms puzzle, you may now jump off the platforms, fall to the floor, and go towards the door. All five players must be close to the door in order to open it.
Lightlocked Platform
Your group can now proceed towards the Lightlocked Platform that is pathing back and forth across the bridge. To hop on it, stand slightly below the top of the stairs and click the platform when it gets close to you.
 Originally Posted by Blizzard (Source)
For the final puzzle, your group must get across a field of magical energy, using a platform that travels back and forth across it. If you step in the field, you'll be teleported back to your side of the field.
While riding the platform, it will stop in the middle of the field, analyze the current group of riders, and let them pass if it approves. If not, it will dump them in the field, and you'll have to try again.
This is a variant of the classic river crossing puzzle. There are three roles which the five people are randomly (and secretly) assigned to—one driver, two adults, and two children. The platform must always have a driver, and is big enough to hold one additional adult, or two additional children, but not two adults. It also can't go across with only a driver.
Therefore, valid combinations that are allowed to cross are driver + adult, driver + child, and driver + child + child. Experiment until you can find who your driver is, then start using them to ferry people back and forth.
Once you've found out your roles, here's one possible solution:
| Starting position | [DAACC ] |
|---|---|
|
DCC to exit side |
[AA DCC] |
|
DC to start side |
[AADC C] |
|
DA to exit side |
[AC DAC] |
|
DC to start side |
[ACDC A] |
|
DCC to exit side |
[A DACC] |
|
DC to start side |
[DAC AC] |
|
DA to exit side |
[C DAAC] |
|
DC to start side |
[DCC AA] |
|
DCC to exit side |
[ DAACC] |
We recommend you follow these steps to find the roles for each player:
- Make groups of two players and have them ride the Lightlocked Platform until a group passes and returns successfully.
- From there experiment different group setups to figure out which of those two players is the Driver.
- After that, go in combinations of three people with the driver until a group passes (Driver + Child + Child).
- Once you've identified the two children, the two remaining players will be the Adults.
- Now that you've found the roles for each player, follow the solution highlighted above to complete this puzzle.
Once all party members have crossed the bridge full of arcane lava, stand close to the door in order to open it.
Note: Due to server lag, players unequipping the Talisman of True Treasure Tracking and other random bugs, no combinations of players might be valid. If that's the case we recommend restarting the puzzle by reforming the group and getting a new code from the Lost Cat Toy.
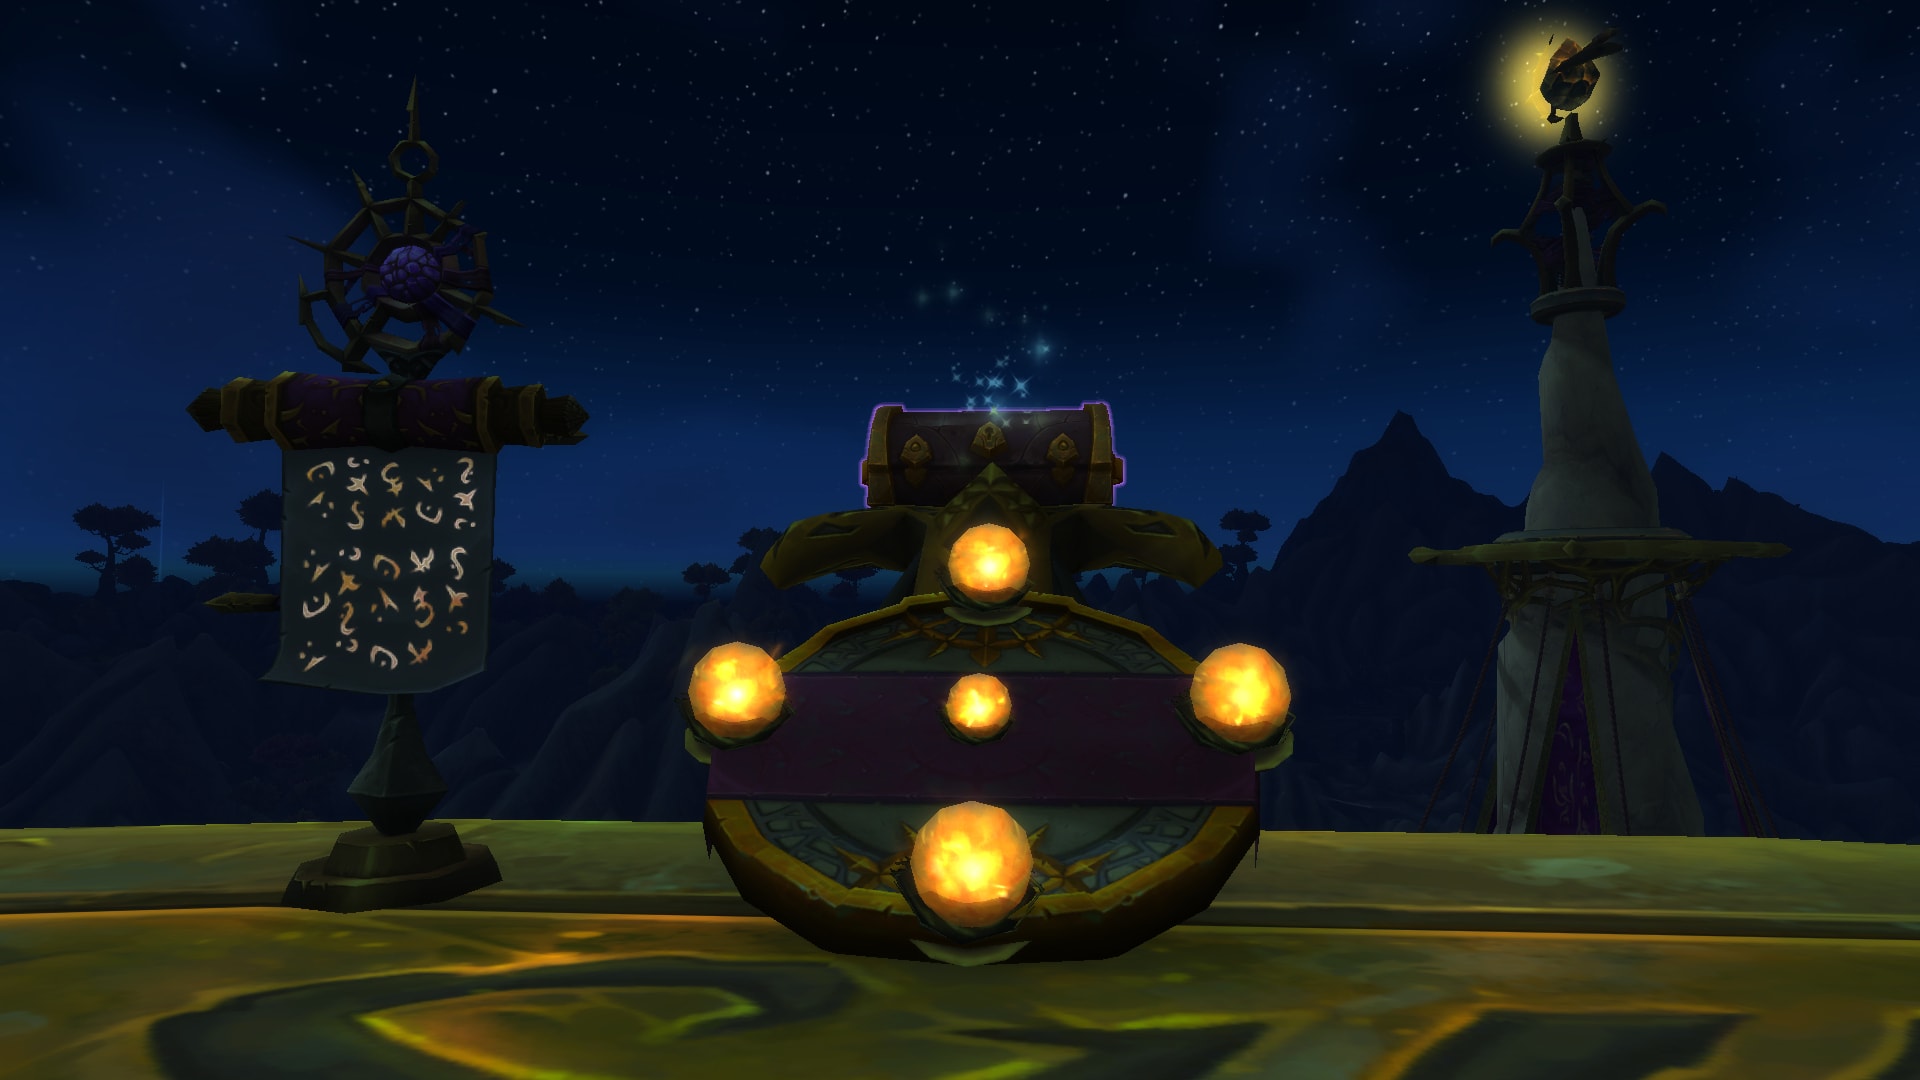
The Hivemind
In the last room you'll find The Hivemind, along with five purple spots on the ground for players to stand in and channel. Once everyone is channeling at the same time, you will receive The Hivemind in your bags! Congrats!
As noted in the beginning of this guide, The Hivemind mount acts as a vehicle, allowing the last players you attuned with to join your Hivemind. The mount's movement speed is increased by 10% for every player that joins the vehicle (Joined Hivemind). If you want to link with different people, you'll have to complete the final parts of the puzzle again.